|
............... BRUSHIN 101 ...............
So Ya Wanna Learn To Airbrush!
I am not the best teacher around so bear with me if I get a bit long winded or too brief. I lay no claim to being a great artist nor professional. All I want to do is to help others to begin and better themselves with the airbrush. I don't know nor can I do it all but I have learned a few things over the past 20 or so years. I is my hope to be able to convey those things here. I am planning on doing this in sections and all will basically be centered on automotive (hard surface) painting. The focus throughout will be on airbrush control and I encourage those of you to practice as much annd often as you can until you can operate the airbrush without having to think about doing it, just like writing. You had to put forth an effort to make each letter when you were learning. Now, most of us just "Do It". The airbrush can become the same. Above all things that will be covered, "HAVE FUN!" If anyone has any questions I have set up a bulletin board here on this site. You can find the link to "Wassup" on the home page.
|
|
|
Class Begins!
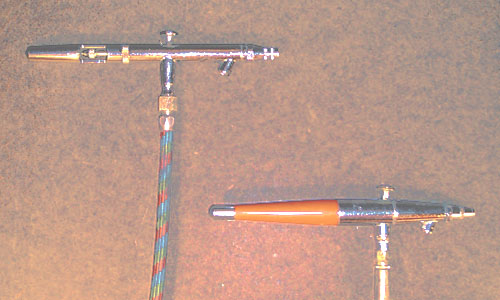
Airbrushes: What do I need? You need a internal mix, double action airbrush such as a Paasche VL, Badger Crescendo, or Iwata Eclipse. Double action brushes take a little getting used to but are far better for control, especially when shading. Later on I will touch on mini and full size guns for shooting base and clear coats. I reccomend starting with the VL. You can get one in a kit form which comes with all 3 available tip, head, and needle sizes. Parts for the Paasches are much cheaper also. I suggest when purchasinf your brush/kit to but a few extra#3 (Most commonly used) tips ans perhaps an exrtra #1 tip (fine detail). An extra needle of the #1 and #3 would hurt either. A Paasche VL and Iwata Eclipse are pictured |
Airbrush Fuel...
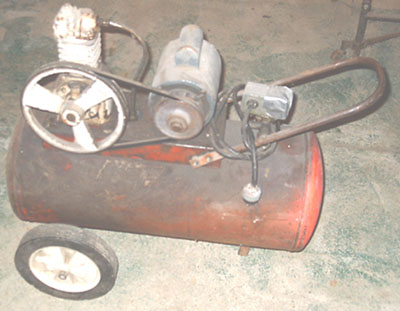
You didn't think they were self propeled did you? Of course you will need a compressor to power your airbrush. If at all possible stay away from the small, diaphram type compressors made for airbrushes. For equal or even less the cost, one can find a good quality 1/2 hp or larger garage type unit at a yard/garage sale. You will need a regulator, preferably one with a built in water seperator. Low cost units can be found at most home supply stores such as Lowes, Menards, or Home Depot for around -. If you can I suggest a unti built more for production use. Sharpe makes a filter/seperator unit for around . Pictured is a yard sale find.
|
|
|
|
Paint and Supplies...
There are basically two types of paints that one will come across for custom painting, solevent based and waterbased. I have in the past and hace seen other use both types on one job with success but I do not reccomend getting into that habit. For sake of discussion I personally favor solevent based and will only cover them within this "How To." At least on this page anyway, but we will cover them eventually. Your best bet is to visit your local auotmotive bodyshop supply jobber and get aquainted with what brand and lines they sell. Most paint manufacturers have basic to premium lines of paint. However I do not reccomend mixing and matching brands or even lines within one brand. I have and use other brands but I am partial to PPG. Mainly for for ease of mixing and cost. Mixing ratios are simple and with base coats (Deltron DBC), Clears (Concept DCU), And single stage Acrylic Urethanes (Concept DCC) one only needs to buy one reducer and one hardener. For all three I use DCX61 hardener (base coats do not use hardeners) and DT reducers. You may require more than one reducer because they are labeled according to the temperature they are designed to work in, i.e. DT 865, DT870, DT880 etc. The temp ratings are really only super critical if color matching but do affect curing time so it is up to you. I almost forgot to mention that a big plus with the DBC basecoats mixed with the DT reducers is that after they are mixed and sprayed, the leftover in the gun can be returned to the can to be used again on another project!
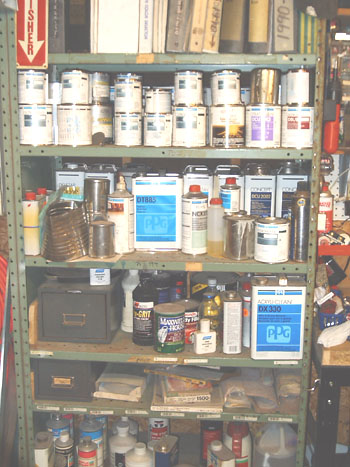
What you see to the left is a small portion of my "stash" here at home. For those of you who may recall my mentioning about a benefit of a good relationship with your paint jobber? See the top shelf of paint? There is several hundred dollars worth of paint there and all were FREE! Most are missmixed paints that were either caught before they were sent out to the bodyshops or rejected once they got there. Typically they get put onm a back shelf somewhere and eventuallt thrown away. Even if you can't score them for free you can usually buy them for pennies on the dollar. If don't get any say on the colors but hey, the proverbial beggar can't be a chooser!
|
Just Play With It!
Load your brush up with some thinned tempura from the art store and get yourself a roll of paper towels. Set the air at about 50-60 lbs and simply begin to play around with your brush. Find out what happens when you pull all the way back and then push down. Then find out what happens when you push all the way down and rthen piull back. Experiment with positions in between. Simply begin to find out what the brush will do. Here we are dealing with hardsurface painting where brush control is of the utmost importance. Basically learning to control the trigger to do fades or shading. Do this on a paper towel until you get the feel for it then set up an old car hood and begin to practice on this. I suggest getting a can of One Shot lettering enamel and using this as it takes it a while to cure and can be easily wiped off so one can start again! Freehand lettering and graphics will come as one progresses with their airbrushing ability.
|
|
|
|
STIPPLING
Ever see graphics that look like a rock? Kinda like somebody sliced up some granite and slapped it on their tank? This is called stippling. It is quite simple and can yield big results!
Since the brush was loaded up with black already that is all I used. Until one is comfortable with trigger control, turn your air pressure down to about 25-30 psi.
I masked off and area simply for instructions sake so do as you like. Besides your airbrush and paint you will need to find something narrow and somewhat flat such as a popcicle stick or a spring type clothes pin. Your thumb nail will work in a pinch! |
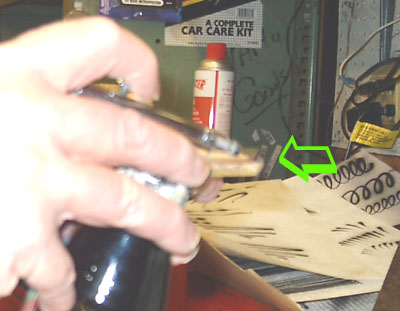
GETTIN' THE RIGHT ANGLE FOR THE DANGLE!
The trick is to shoot the paint on the stick, clothes pin, or thumb nail in such a way so the paint flows to the end and is lightly blown off in droplets. The higher the air pressure the finer or smaller the droplets. You will want to experiment not only with airflow but also the distance you are away from the surface. The angle at which the airbush is in relation to the "Stick" will change things also. Remember, EXPERIMENT and find out what you can make your brush do. It cannot do anything by itself!
|
|
|
|
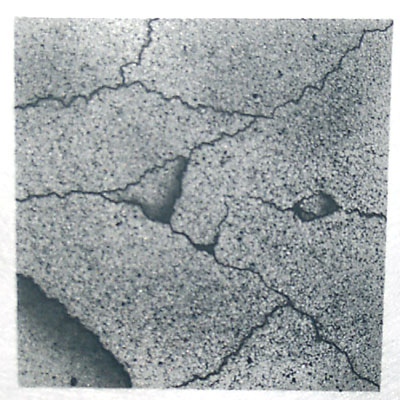
SLAB 'EM!
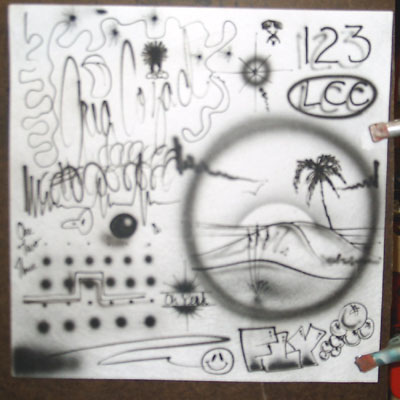
By varing airpressure, airbrush angle, and distance I ended up with this. I added some freehand cracks (for those of you with shakey hangs this ought to be a sinch!). Added a bit of sading to certain parts of the cracks and this is what we end up with. Total time: about two minutes! Adding color will really bring this to life. Natural combonations are Pink/Grey/Black/White or Shades of Brown/Tan/Black/White. You could also use the accent colors of the vehicle you are doing also. The only limitation you have is your imagination. If that is a bit lacking, magazines are great resources!
|
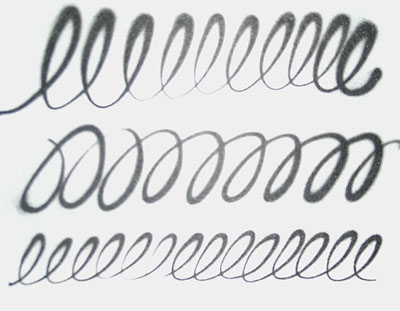
Eeeeeeeeeeeeeeeeeeeeeeeeeeeeeee
Here is an exercise that will help with trigger control. Looks like I need a bit more practice myself!!! It is quite easy to figure out and is one that should regularly be practiced if you are intending on doing freehand lettering of any kind.
|
|
|
|
Remember, if you got any questions email me or go to the home page of this site and clink on the Wassup link for the site board. |
|
|
|